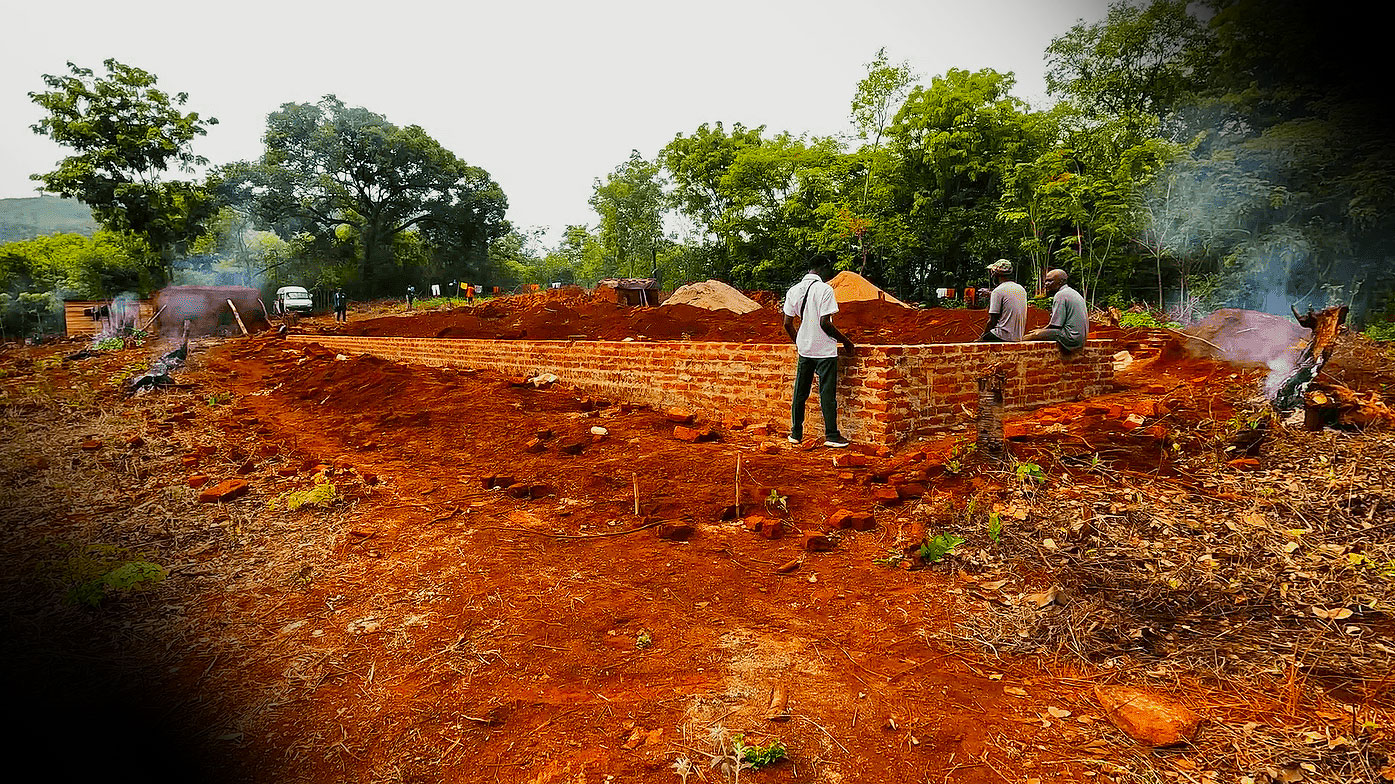
As soon as we got the land, the next important step to take was to secure the land by putting up a perimeter fence.
Once this was done it was time to start working the land. Working the land meant opening crop fields and starting some construction work at the site.
According to rural regulations in Zimbabwe, you are not permitted to live at a homestead without a toilet. This is the rule. However, enforcement of the rule pretty much depends on the local traditional leadership.
Some turn a blind eye for as long as possible.
At our location, the rules are strict. This had to be done. A toilet was needed as soon as people started to work at the site. Even without the rules, it’s a health hazard to have people working at the site using the bush as it where.
So as soon as we had the fence up we were already working on building an ablutions block. This was to be used by our first employee, the caretaker, as well as by the builders who would live at the site until major construction work had been completed.
We are not yet sure what will become of this toilet once the main house is completed, itself with modern inside toilets. If we are to keep it, we shall hook it up to the sceptic system and make it a modern flushable toilet.
No Plan
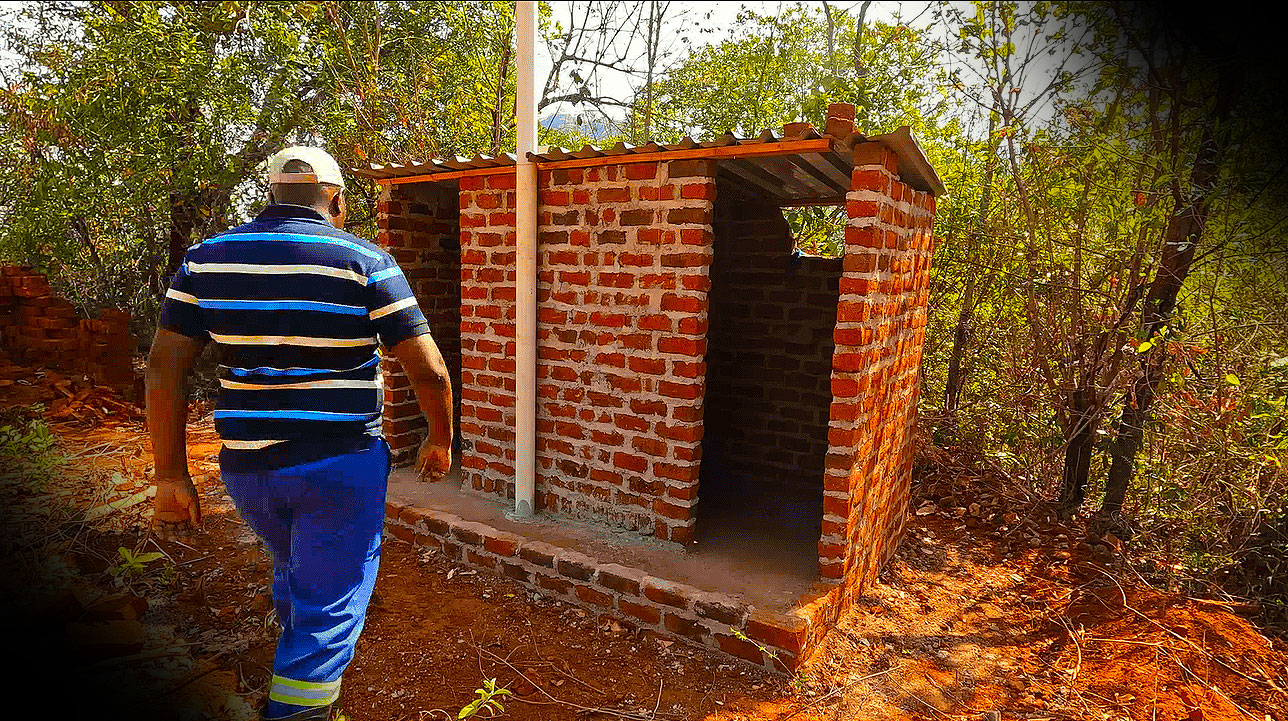
We had no plan or blueprint of how the toilet building should and would look. We, however, knew that it had to have a toilet and a separate shower section.
This is all we told the local builder.

The image above is the actual completed ablutions block. The initial plan was to plaster it. The red brick work came out nice to our eyes so we settled for it as is.
In fact, if we had known it would look this attractive, we would have asked the builder to go even neater with the mortar on the courses. He had approached it with the mind for plastering later hence some parts of the courses didn’t look that neat. From a distance, the finishing looks good.

This is a pit toilet. It’s built on top of a 3 meter deep hole. The hole is lined with a 230mm brick wall from the bottom up. This 3 meter depth is a government requirement for health reasons.
So we first had to find someone to dig the hole before the builder would start working on the walls. This kind of digging work is done for US$20 in the village, taking 3 days to complete, all things being equal.

This didn’t go smoothly at first, for two reasons. The first attempt hit a rock at about 2m. We shifted the digging site about a meter to the side. This time we got a full 3m with a few rock encounters along the way.
In some cases, if you hit a rock at 2m, you could compensate the missing 1m by allowing the floor of the toilet to go off the ground by 1m as well.
The rock problems delayed the toilet construction by about a week. This was also partly due to the fact that the digger we had found at first turned out to be a gold digger (pun intended) for he took the full amount before digging and grew lazy to dig after hitting the rock.
The second successful hole was actually done by a different person.
This is yet another important village lesson. Play by business rules. Only pay as agreed after full work has been delivered.
The Materials
The following is a list of materials that we procured in order to produce this ablutions block.
- Hole Digging (3m deep)
- Builder labour – US$70
- Bricks x 2500
- Cement x 6 bags (Midlands Portland Cement)
- Pit Sand x 2 tons
- River sand x 2 tons
- Concrete Stones x 3 wheelbarrows
- Rivets
- Mesh wire x 1.5m
- IBR sheets x 6
- Toilet seat x 1
- Ventilation pipe 3m x1
- Pareline 3m x2
- Wire gauze x1
- Roofing nails x 1kg
- Tying wire x1kg
- Brandering x 6m
Finally, to keep your pit toilet odor free, do not let the water from the shower side drain into the pit latrine. Rather it should drain out of the shower to outside of the building.